Loading... Please wait...
- Home
- Inkjet Media
- The Ink2image inkjet media range
- i2i Printastic Inkjet Display Fabric
Categories
i2i Printastic Inkjet Display Fabric
 5 mil thick - 100% polyester non-wrip fabric - repositionable self adhesive backing - OBA free. Printastic works with any desktop or wide format inkjet printer, and adheres to virtually any surface indoors or out. The special adhesive backing enables Printastic to stick firmly to painted walls, varnished wood, glass, plastic, and metal, and then be removed later without damage. Printastic never loses its tack so, as long as the surface it is applied to is clean and stable, it can be removed and re-applied dozens of times. The print surface accepts both dye and pigment based inkjet inks, and the bright white finish produces stunning color. The fabric used in Printastic is both flexible and non-stretching, and the non-fraying weave makes it easy to cut with either scissors or a sharp knife. The uses for Printastic are numerous in both home and office, and are only limited by the imagination.
- Works with any aqueous or latex ink printer - Epson, Canon, HP.
- Can be used indoors and outdoors.
- Excellent D-max for bright vivid colors.
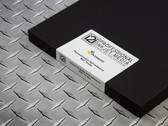
- More opaque than competitive products - works great on dark surfaces.
- More tacky than competitive products - stick to virtually any surface even ceilings.
- Flexible for application around corners, pillars, and poles.
- Will not shrink, tear, or wrinkle.
- Can be contour/kiss cut.
Use Printastic to print posters on an Epson desk top printer!!!
All Epson driver software has a built in poster printing function that takes an image and automatically prints it in panels to form a larger image. This function works great with Printastic as a way of printing self-adhesive removable wall posters at a much larger size than the format of your printer. You can even trim around the image with scissors or a knife to make cut out figures or decals. With a letter size printer and Printastic 8.5" x11" sheets, you can make a poster up to 34" x 44". If your printer can print up to 13" wide then using 13" x 19" Printastic sheets means you can print as big as 52" x 76". Here is how you do it:-
1. Start with a good high resolution image. If you are using an image from a smart phone, then use the original image and not a reduced size version. Resize and crop the image to 8.5" x 11" if you are going to print on Printastic letter szie sheets or 13" x 19" if you are going to use 13" x 19" sheets. Resolution of the image should be at least 300 dpi.
2. Before printing the image go to the properties or settings of the Epson driver software and set the paper type to Ultra Premium Presentation Matte or Epson Enhanced Matte, and the paper size to letter size or 13" x 19" depending on the Printastic sheet size you are using.
3. Check the borderless printing button.
4. Under the Page Layout tab, check the Multi-page box and then the Poster box. Checking the poster box will either show an option for the number of pages to be printed, or a settings option where the number of pages to be printed can be set. The options are a 2 x 1, 2 x 2, 3 x 3, or a 4 x 4 page poster. Select the option depending on how big you want your poster to be.
5. Load your printer with appropriate number of Printastic sheets and start the print.
6. The printer will print your image split into panels that match exactly together and can be applied directly to a wall. We recommend starting with the top left corner panel ( a level pencil line drawn on the wall will help you get the first panel exactly level) and then working left to right one panel at a time aligning each panel up to the edge of the previous one. Then apply the next row of panels below starting with the left hand panel and work your way left to right one row at a time until the poster is complete. A dry sponge is useful to smooth down the material without bubbles. If you make a mistake or have a crease in the image then simply remove and re-apply. With a little practice, you will be apply the sheets with virtually invisible joints between panels.
7. If you want to make a cut out figure or decal, then follow the steps above. Before you remove the backing paper to start to apply the print to the wall, trim around the outline of the image on each panel with scissors or a sharp knife, then apply to the wall as above.
Printastic is supplied in cut sheets or rolls. Pricing is below.